Saturday, September 26, 2015

A little bit more on the 18th Century Corset.


finally transfered these pics so I could uploads them, but admittedly not too much progress has happened. I have yet to make up my mind on what I am doing for the binding so I have seriously been stalling. I did however, get both linings basted in, and one half's grommet holes done. Not quite as neat as I would like but at least they are done. 

 
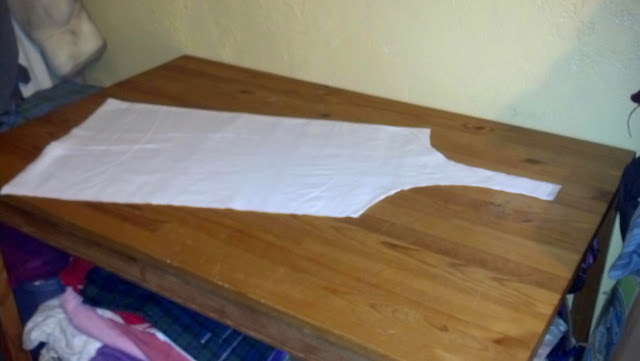
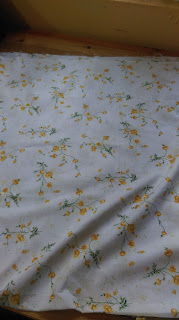
I had this nice piece of vntage cotton--lovely and soft--that I thought would make a nice lining.


I took the corset, and making certain the it was flat across the top and middle, pinned it to the lining. It is important that there is no wrinkles in the cotton when you do this. You want it perfectly flat all the way down to the waistline; from waist down I did it was done differently.


This is not the best picture to illustrate this, but I will try and explain. There is "give" in the shape of the corset from the waistline down, as the pieces move and spread to go over the hips, to make this work our correctly, once i had to top part pinned smooth, I flattened out the bottom pieces as much as I could to give that spread, then cut all the way around--from waistline on one side, around the bottom, to the waistline on the other side. One it was cut out, starting from the center back I started to pin the tabs, slicing straight up the middle between them so there was enough fabric to so spead out. The most difficult piece is where the side front/front meet, but I used this same process, moving and flattening the pieces as I went. You have to pin each piece really thoroughly or they will slip.


Once it was all pinned, I started to baste the lining to the silk by hand. I thought about doing it by machine but felt I had much better control if I did it this way instead. Now the top and bottom (including tabs) are basted on WITHOUT turning under or finishing the edges, this is because of the binding. At center front and center back the edges were turned under. I gave myself a good 1/2" inch for this, It not only made it easier to pin, it gaves it more heft for when I sewed in the grommet holes.


I trimmed all the excess away. I was sirprised at how neat it turned out to be.

It's that time again...

Yes, it is that time again; when I actually FINALLY get off my fanny and post to the blog, and plan out what may--or may not--get done for Halloween. After several custom costume transactions that turned out to be more of a pain then they were worth, I am taking a serious step back from it and concentrating on actually sewing some things for myself and my family. I have an event coming up a Bustle Era event coming up on October 11th, and then Halloween looming in front of me, so I need to get moving on the costumes for both. So I need to complete the following outfits:

1:Bustle Dress--including petticoat, chemise (I get to cheat on corset and Bustle because the lovely Mara gave me those), drawers (still not sure on these), Hat and ruticle. Hey no need to panic I still have 13 days??

2:Assasin Costume--My daughter saw a cool cape pattern from Simplicity and wants that for her costume. What the rest of the thing will entail we have yet to decide.

3:Link Costume--Can't remember which one my son said but I know it did not involve chainmail. Going to try and use more historic shapes and fabrics so he can use this for other things as well.

4:Anime Costume--Don't know which one this is. Making it for my son's friend.

5:Husband's Halloween Costume--this could end up being either Hagrid or the Jolly Green Giant.

6:Simplicity 1777--Almost forgot about this one! I am supposed to be doing a sew along for this dress with Melissa. Need to get going....

Sunday, November 2, 2014

1880s Chemise

Just doubled fabric and cut out basic shape from muslin I had on hand. We will see how it turns out.

18th and 19th Century Corsets.

Though I am working on my 18th century stuff, an event came up for some 19th century bustle dress goodness, so now I need to get going on that as well. I don't have much time, and no money, to put out on the Victorian ensemble, so am having to go with whatever is in my ever dwindling stash.

I ironed down the edges on all the pieces of my 18th century corset and stitched them down. I saw this technique used on a couple blogs and thought I would try it, as I am hoping it will neaten up the finished product. Mt next step is to whip stitch the pieces together.

For the Victorian corset I did not want to waste time drafting, so I found a corset pattern with pieces close to the shape I wanted, then did some serious tweaking. I lengthened it, the reshaped the pieces over the hips and some at the tops. I used some beautiful fuschia Moire taffeta for the corset and cotton duck for the interface. Was just getting ready to start on it when I discovered I have no more corset busks! NOoooooo! Will have to hurry and order one tomorrow. Guess I will start on the chemise or something.

Thursday, October 30, 2014

Kali's costume for The Gathering of Rebels.

I wanted to take pics of this as I worked on it, but I was so rushed with everything I really didn't have time. I used a Simplicity pattern which I redrafted to make the pieces a bit more historically accurate, though I didn't go overboard with this. It is not something I intend on keeping, or figure I will even get much money back on so I didn't complicate things too much.


I used a white/gray print cotton I have had in my stash for YEARS and then a gray eyelet I found and Goodwill for $3.00 for 5 yards (not period correct I know, but looks nice and was cheap). I used the cotton for the jacket, and then the eyelet for the skirt and trim.

Except for the outer sleeve ruffle shown here, I used the eyelet. I decided for sake of time and my sanity--and because I have always wanted to try it--to pink all the edges instead of hemming it. It looks okay. I know the fraying is natural, even with the pinking, and you see real examples of 18th Century gowns with the same thing happening, but I am not sure I am crazy about it. Sort of makes it feel 'unfinished' to me so I don't think it is something I will do again unless I want that as a specific design element.


I did not want to have to mess with a corset for her so I boned the front of the bodice with the ever handy weed-trimmer line. Worked great! I added a small modesty panel at the front and the hand-cast eyelets (not my best work on these I can tell you) are hidden by the ruffles. Only thing I can say is I wish it would have been a bit tighter so she had that 'lift'. When I first fit it I was afraid it would end up being too tight, but I think she lost some weight before she actually was able to wear it. I was going to take it in but decided it was just too much work for something she was only going to wear the one time.
I forgot to charge my camera, which is actually an old cellphone that I use, so I did not get pictures on the day. A few people at the event took them so I am waiting for them to get posted up to Facebook. There should be quite a few full length pics from that. What I have right now is the one of them sitting down, and then the one Kali's dad took right before they were going to change. After 6 hours they were a bit of a mess as you can tell (I have NO IDEA what the heck is going on with the front of the kilt there lol). I hope to get more photos up soon.


Friday, October 17, 2014

The TARTAN has arrived...

Well after some mix ups, I got the fabric I ordered from Amazon. There was only 2 tartan prints that were in the old fashion so those were what I chose. They are a lot brighter than what I wanted, especially the blue and yellow, which was supposed to be blue and olive. I am going to over-dye it to darken it, but I don't have time to do it before the 26th. Aside form that though, I really like the fabric. It is a nice weight and does look and even feel like wool.

18th Century Corsets

I ended up taking the 18th Century Butterick Corset Pattern and redrafted it. I cut the back lower, added 6"s to the waist reshaped the side piece a bit and changed the boning pattern. I cut it out of a beautiful piece of Goldenrod colored silk (though it doesn't show right in the photos) and did the channels in blue thread to mimic the inspiration images. For interfacing I used some cotton canvas. I will line it in white muslin.


For my daughters little corset I modeled it after an original example I found on Pinterest. I will have to try and look it up again. I cut hers out of a small piece of purple silk I had and am doing it with 2 layers of muslin. I don't want it tight or uncomfortable so it will also be very lightly boned and nothing like the original in that regard.